Paul Hostetter, luthier bowed instruments plectrum and other instruments professional background art plastic! The rest of the site
Email:
click
here
|
OK, before diving into making a pick, let's
remind ourselves that a pick works results from a combination of
things:
Here's how I make a pick. My example here is with some of the celluloid I have in large quantity, some overly-bilious pink with occasional blues and greens in it: 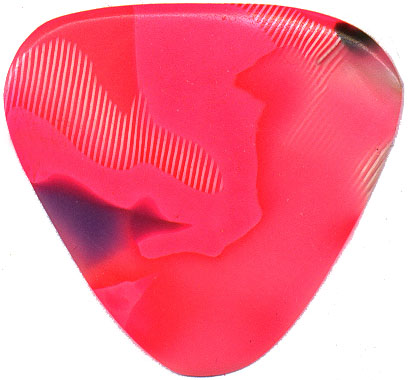 This same procedure will work with just about any material, including reshaping commercial picks. I usually freehand the pick; that is, I just hold a little patch of stuff in my hand and work it with files and so on. I start by tracing the outline on the piece of plastic I'm starting with: [image soon come] I cut that outline out with shears or a jeweler's saw, as appropriate: [image soon come] I refine the outside profile with a large and fairly fine flat-cut file that has a safe edge (for preserving my fingers): [image soon come] To shape the edge, I make the first passes at a 45 degree angle: [image soon come] The I round the two fine edges of that first 45º with the file: [image soon come] Then I complete the rounding with a sharp scraper: [image soon come] Then I fine sand it: [image soon come] An optional final step is to buff it. I only bother with this when I'm making presentation-grade picks for other people, because all that shininess disappears from playing wear and from living in a pocket with coins and whatnot. If you wish to keep your pick, put your name on it: [image soon come] It's amazing how effective this is.
Not everyone can hang onto a small piece like this. If you have a hard time holding this little piece of plastic, you can use doublestick tape to fasten it to a little piece of scrap pine, like this: [image soon come] Now you have a little handle, and with the belt sander, you can refine the outside profile of the pick as you trim the wood. [image soon come] In freehand mode, I simply rough out the shape by tracing a pattern onto the sheet with a pencil, and then cut it out with tin snips. I keep a very sharp pair just for this. On really thick plastic, like some of the 1.5 and 2mm ivoroid, I cut it with a jeweler's saw. In any case, the point is to get a basic shape. Then I refine the shape with a file. I prefer a single-cut knife file, because it leaves a very smooth surface and has a "safe" edge. I first refine the outside profile with the file at right angles to it. I can see it better this way. Then I go around that edge with the file running along the edge (and at right angles to it) so I know the curve is smooth and has no little nicks or irregularities from the file in it. [image soon come] Here's a variation on the chart from the previous page. This is what we're aiming for:
These are the edges of the pick blanks. The top one is without any edge treatment, yet, just lines marking how to chamfer it. The second one down has 45o surfaces, shaped with the file, all the way around. As shown, leave some of the edge, and avoid cutting it to a sharp point. The low one has the edge simply rounded off so it won't scrape on the strings. This is a fairly minimal rounding off, done by either scraping with a blade or with sanding strips (see below), but it's the main thing you need to do. Worry about progressive thinning of larger areas later. Just get a simple pick done the first time, using the original thickness of the plastic (or whatever) you have begun with. It's remarkable how much of the feel of a pick derives from the shaping of this edge. There's more to it than just rounding it over like the above examples. I do a rough pass all the way around, to chamfer the edge, with the file. About a 45o angle, just taking the worst of the edge off. Then I round over those edges with sanding strips. Time out for a moment to talk about sanding strips. I use these for a lot of different tasks in my shop. Basically they are strips of stearated abrasive paper (the white stuff, sometimes called "no-fill") that are reinforced with fiberglass packing tape. On a standard 8x10 piece of abrasive paper, I lay a strip of the packing tape, leaving about 2" extra on either end. I use that end to tape the whole sheet down to a backing board, then use a straightedge as a guide to cut through the paper along the edge of the tape. Then I lift the extra lengths of tape at the end and fold it back and stick it to itself. This give handles that leave the entire length of abrasive paper available. The reinforced paper lasts an astonishingly long time, and also allows you to guide it over irregular surfaces and apply spot pressure on certain areas.
But you can do more, including thinning the edge more gradually. This really affects how the pick flexes and releases the string as you pick it. Also, a smaller edge has an effect on the quality of the snap or release. Stay tuned: more info and photos and especially the vaunted "Gypsy" picks coming soon. _____________________________________________
Back to the second pick page | first pick page | clownbarf page |
Drop
me a line
click
here
This page © 2000-2005 Paul Hostetter. All rights reserved. |